


Currency Configuration
Currency Configuration
You can proceed to configure currencies in the Master settings. This allows you to set the default currency and manage multiple currency options.
Step-by-Step: Adding a Currency
- Navigate to Currency Settings:
-
Go to Master in the admin panel menu.
-
Click on Currency.

-
- Add New Currency:
-
Click the Add Currency button in the top-right corner to open the currency configuration page.

-
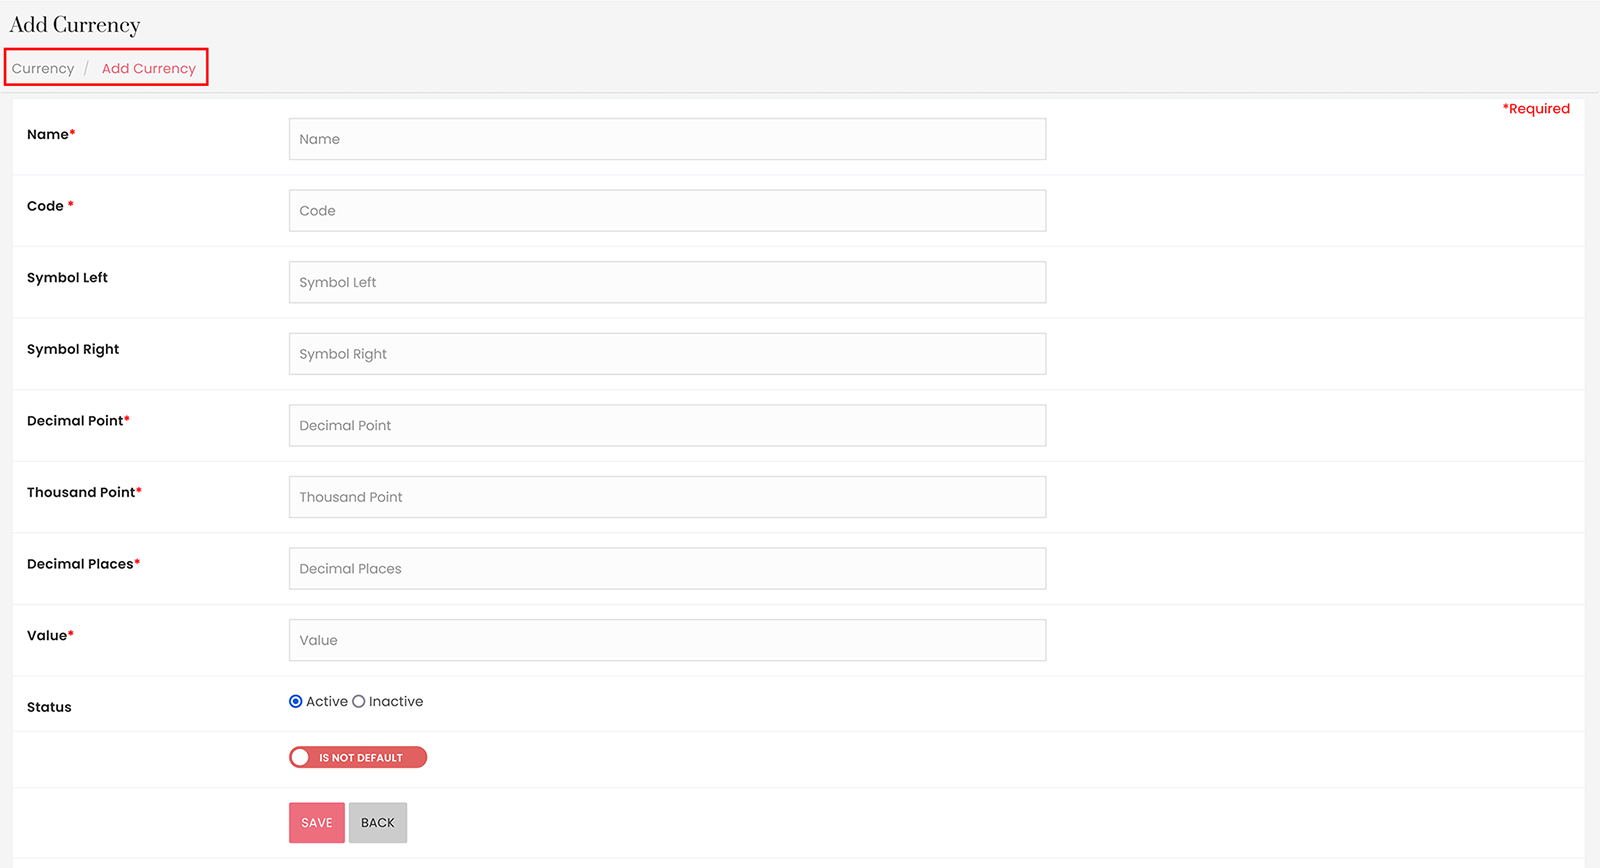
- Enter Currency Details:
-
Complete the following fields:
-
Name*: Enter the currency name (e.g., "US Dollar").
-
Code*: Enter the currency code (e.g., "USD").
-
Symbol Left: Add a symbol to appear on the left side, if applicable (e.g., "$").
-
Symbol Right: Add a symbol to appear on the right side, if needed.
-
Decimal Point*: Specify the character for the decimal point (e.g., ".").
-
Thousand Point*: Specify the character for the thousand separators (e.g., ",").
-
Decimal Places*: Set the number of decimal places (typically "2" for most currencies).
-
Value*: Enter the exchange rate value or base value for this currency.
-
Status: Set the currency to Active or Inactive.
-
Is Default: Select if this should be the default currency.
-
-
- Save:
-
Click Save to add the currency to the system.
-
Your currency settings will now reflect in relevant parts of the platform, ensuring all monetary values are displayed accurately according to your configuration.
